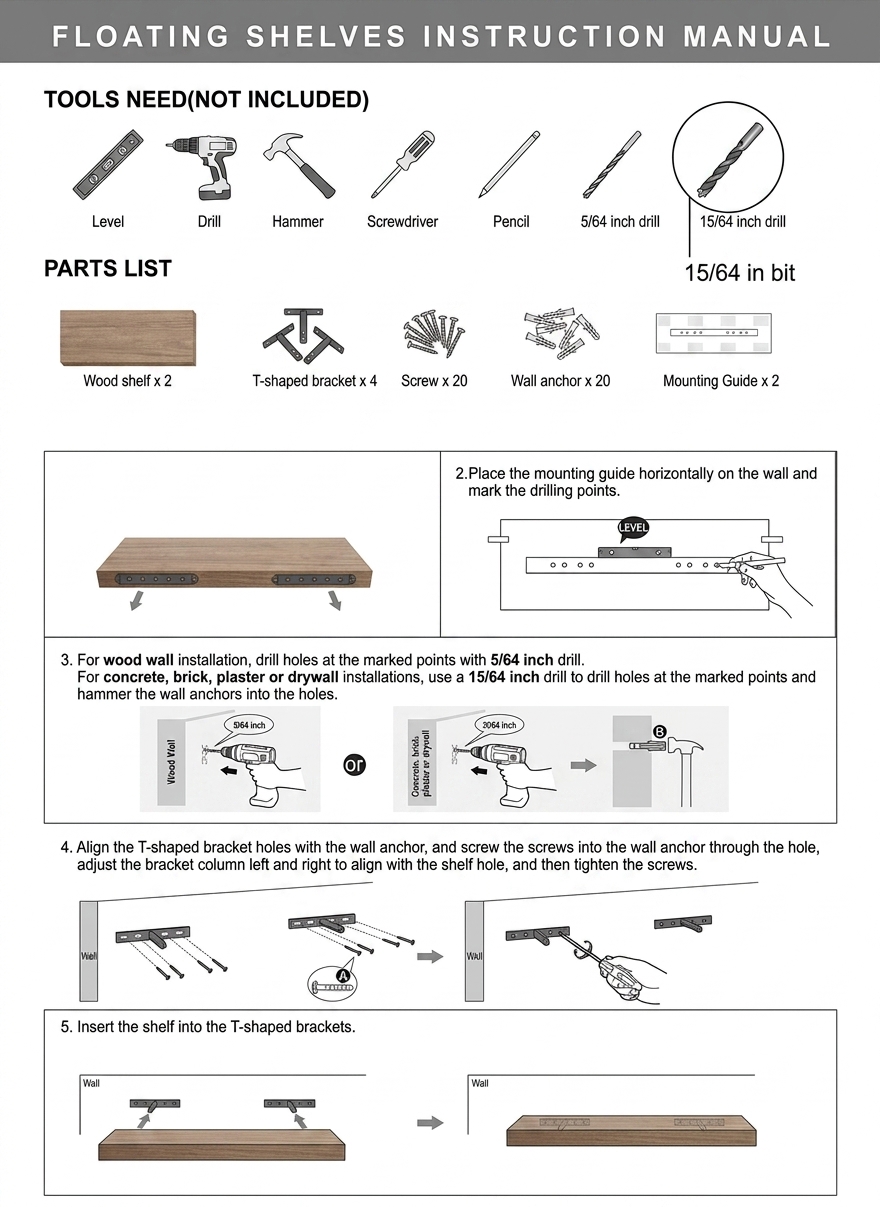
1Gather tools and parts
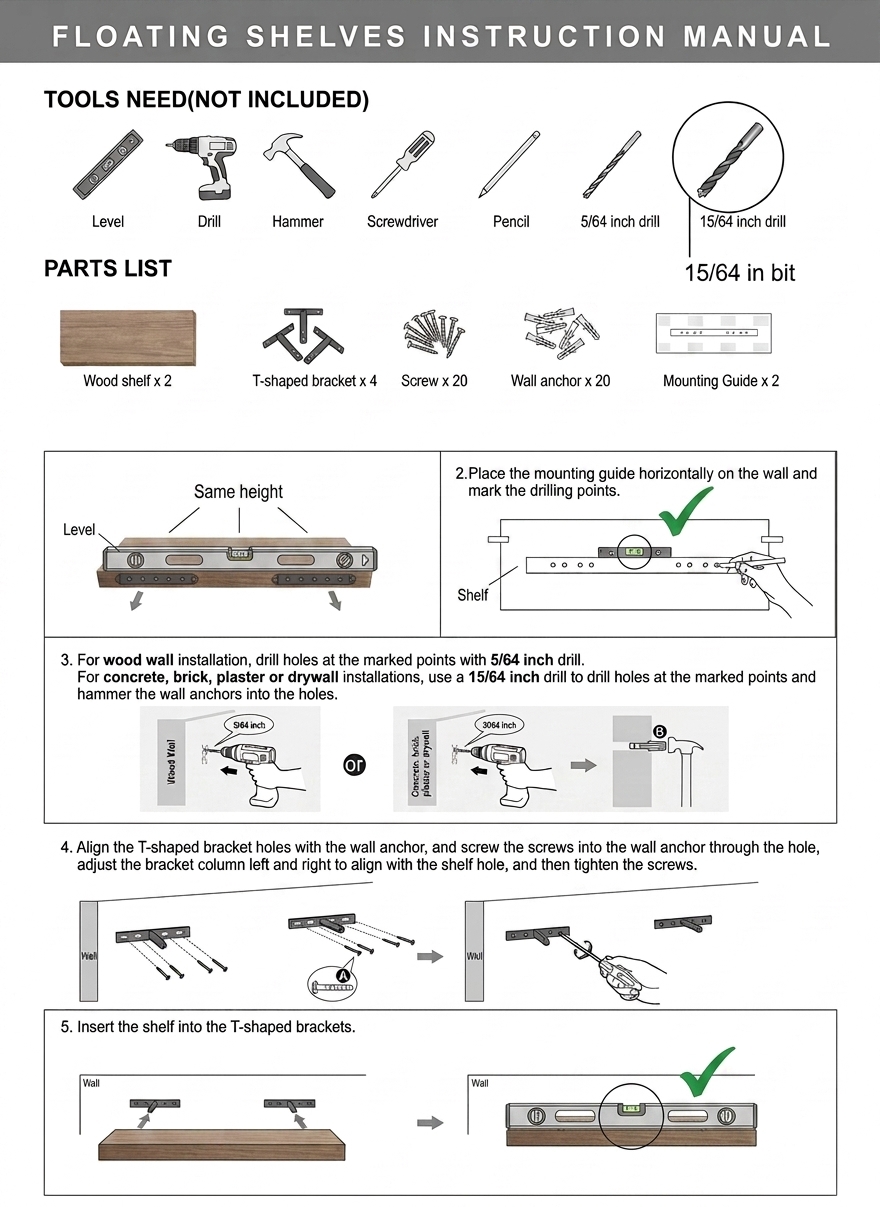
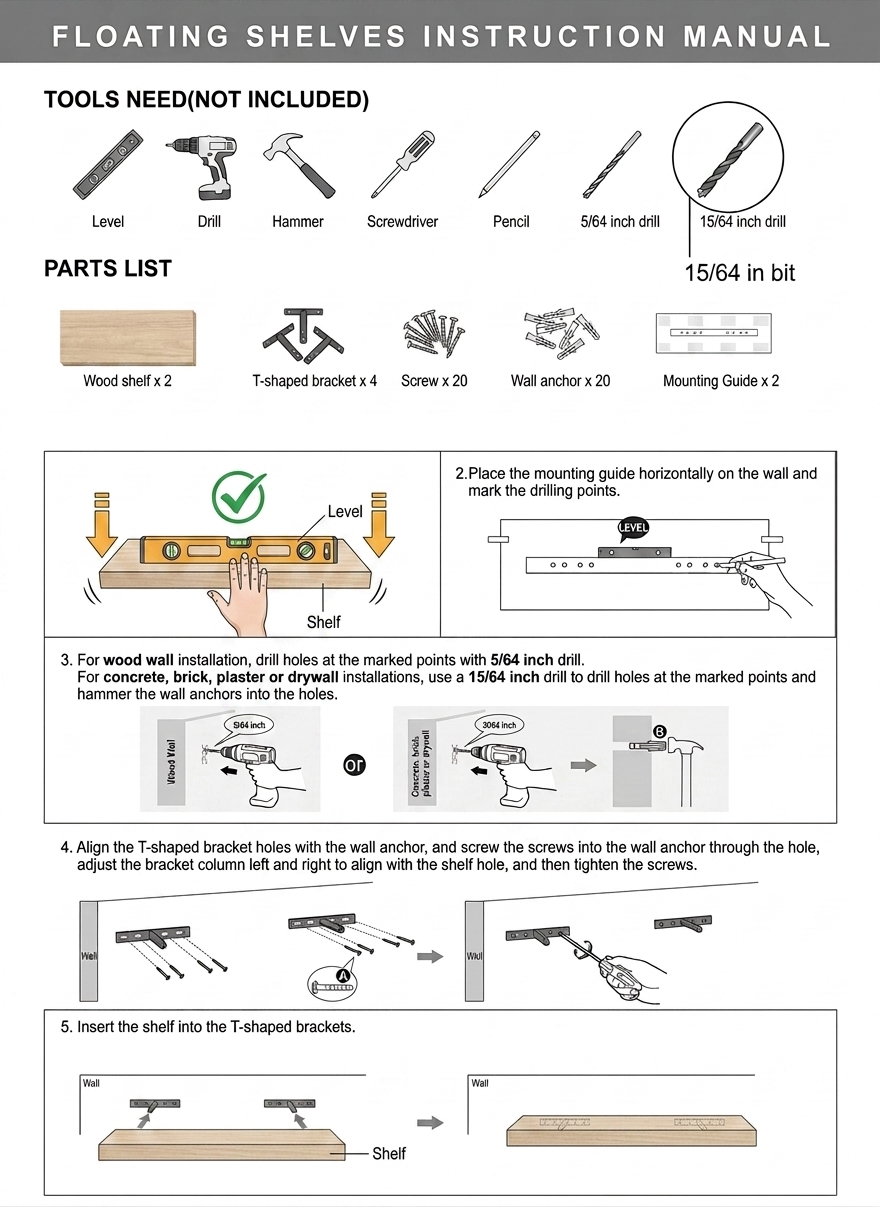
Collect all tools and parts before starting: level, drill, hammer, screwdriver, pencil, masonry drill bit, shelves, brackets, screws, anchors, and mounting guides.
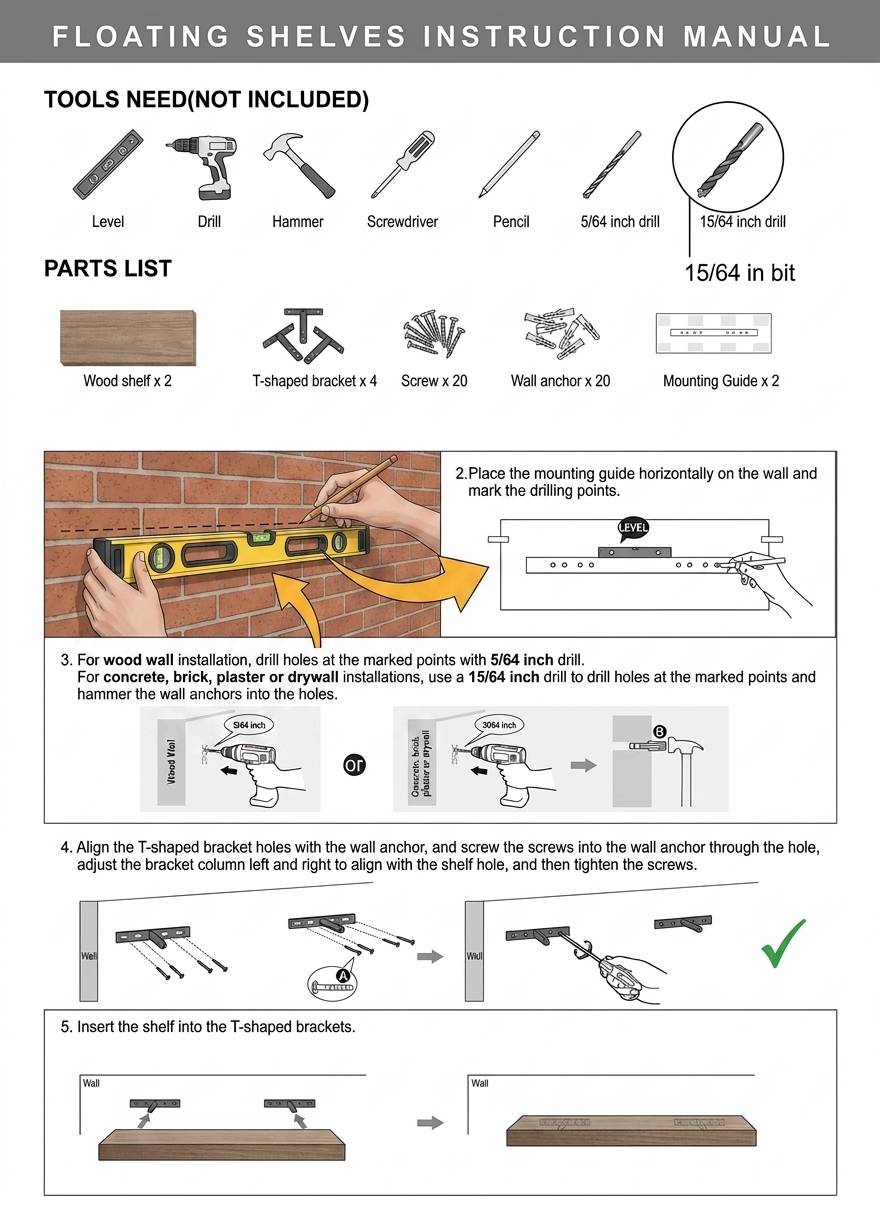
2Mark height reference line
Use your level and pencil to draw a horizontal line on the wall 1.5 metres up from the floor where the first shelf will go.
1.5 m from floor to reference line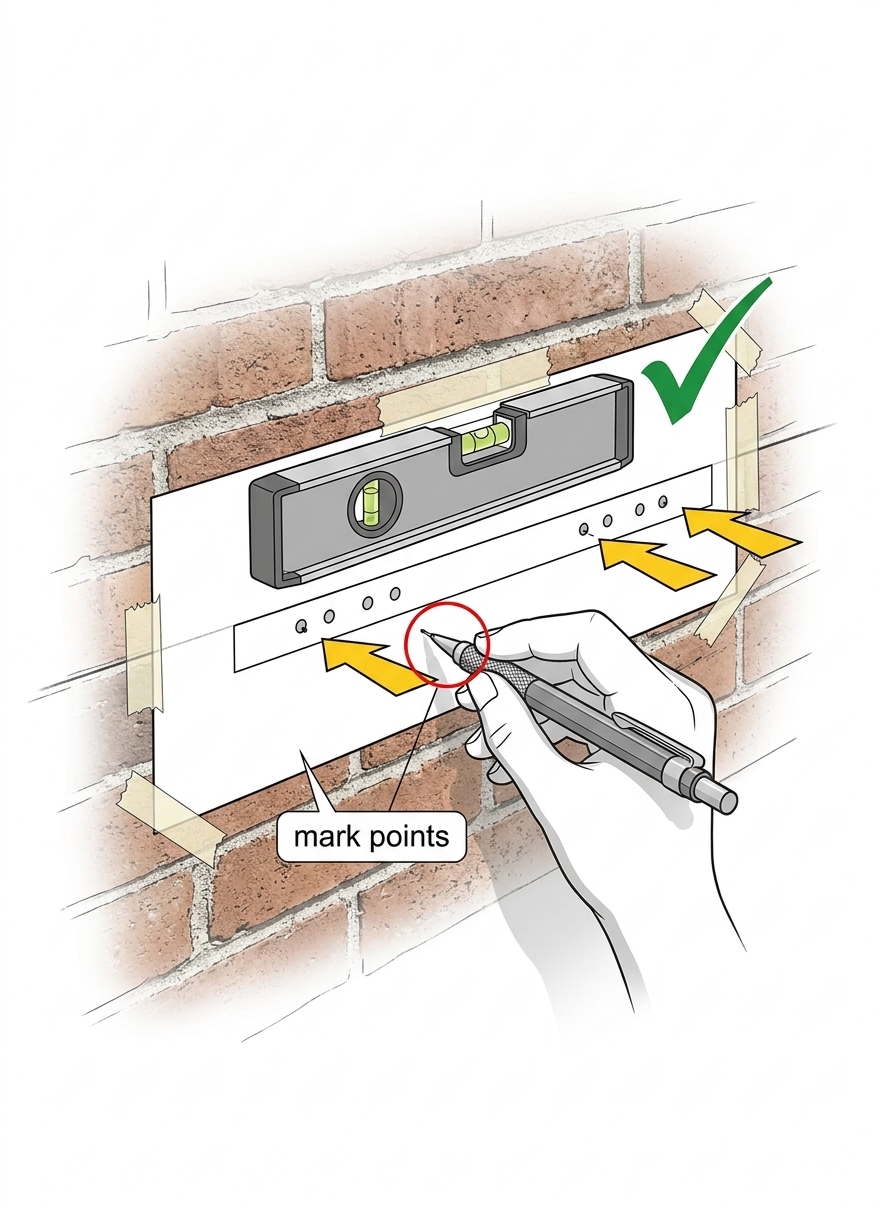
3Position guide and mark holes
Hold the mounting guide against your reference line, check it's level, then mark each drill point through the guide.
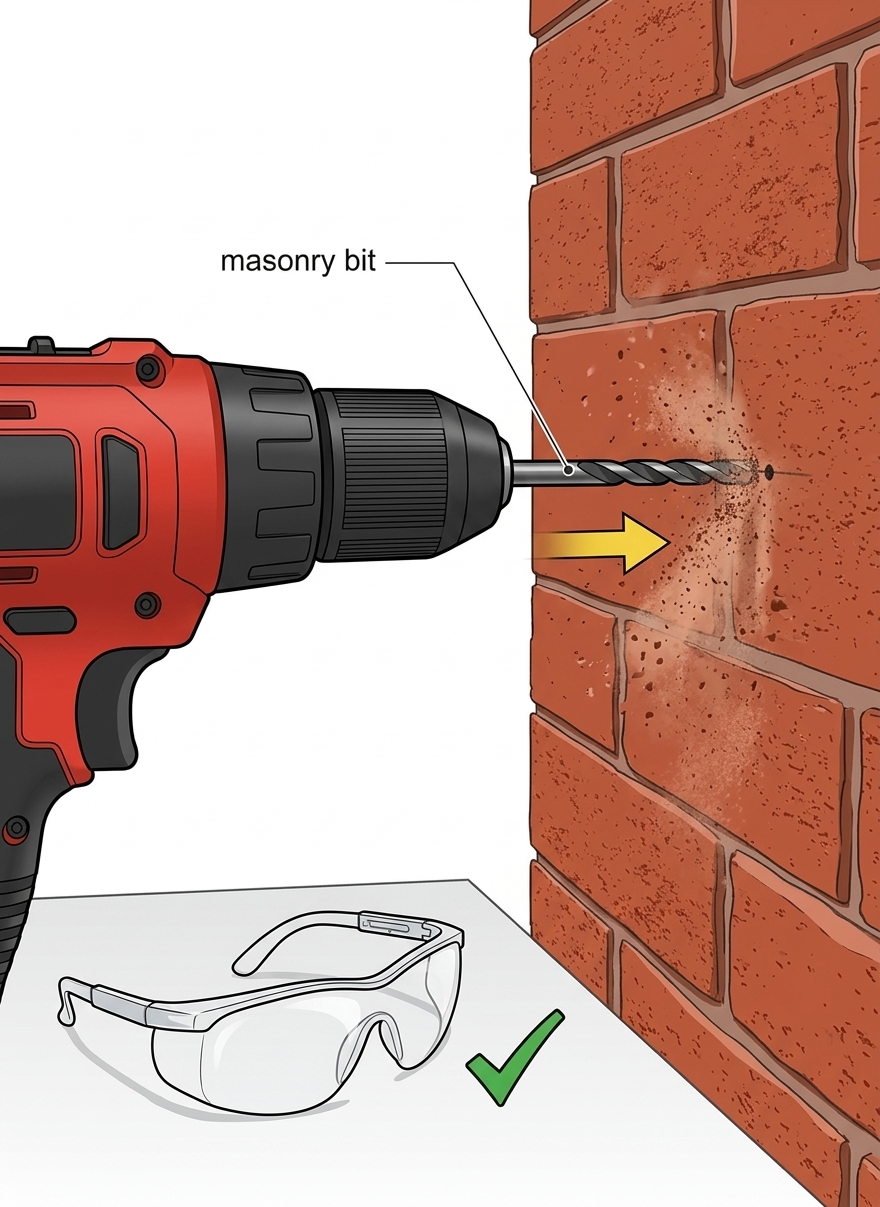
4Drill holes into brick
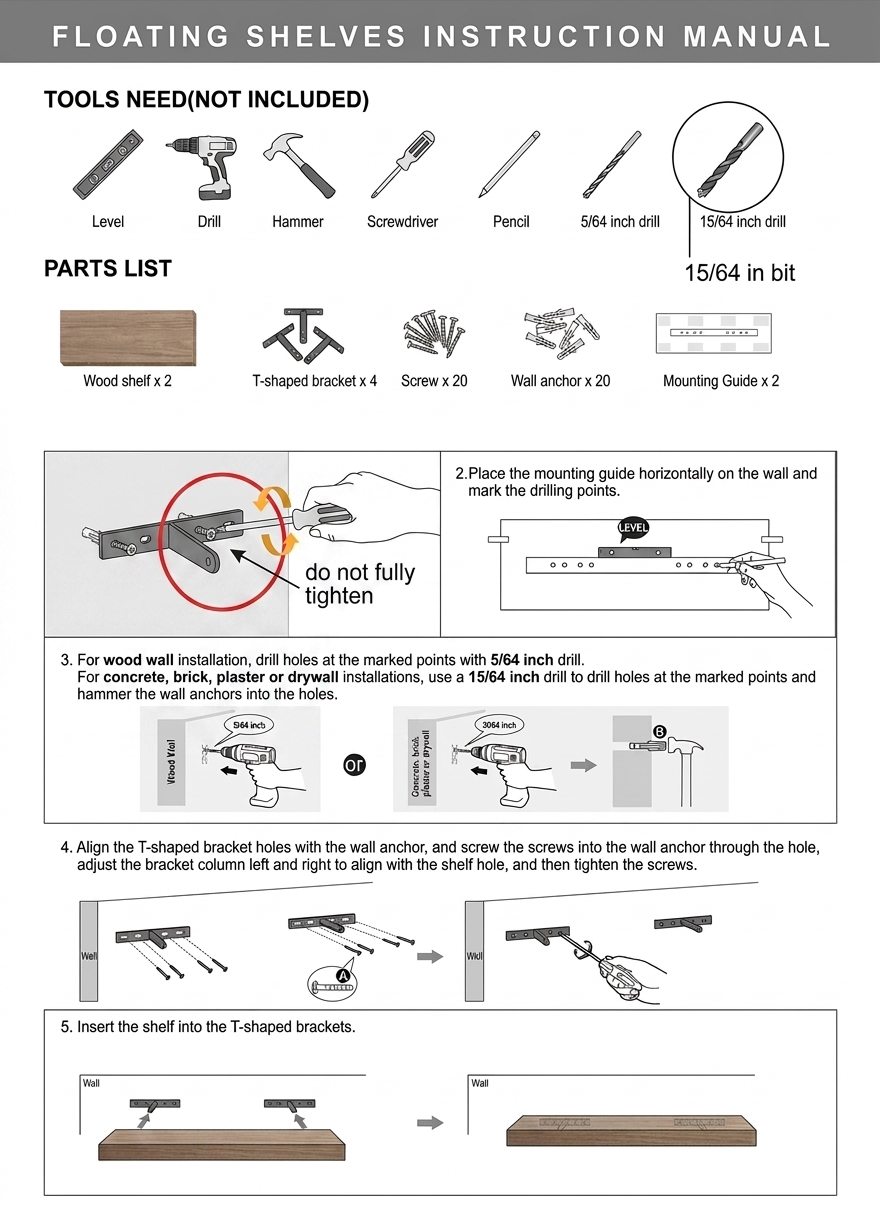
Using the masonry drill bit, drill into each marked point at both shelf locations.
15/64 inch masonry drill bit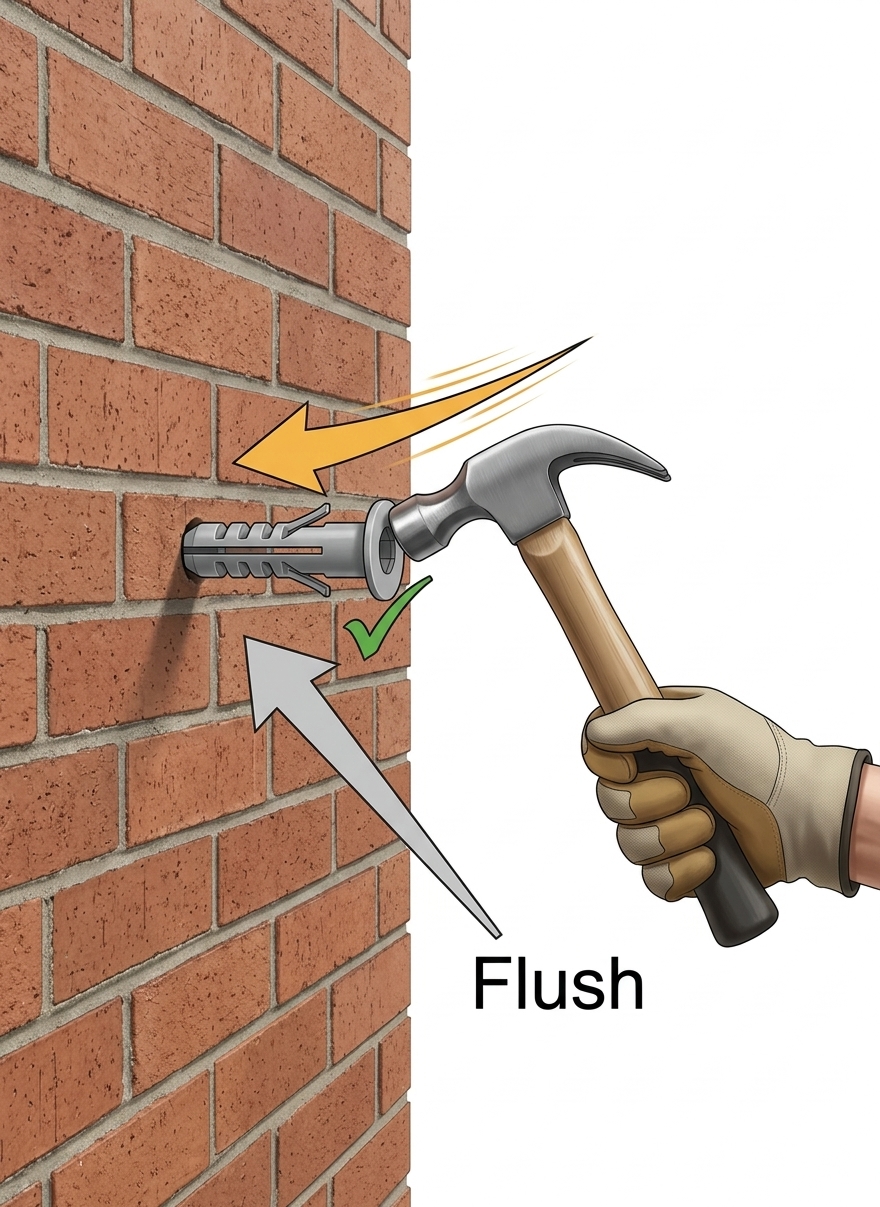
5Hammer in wall anchors
Tap the wall anchors into each drilled hole until they sit flush with the wall surface.
6Attach T-shaped brackets
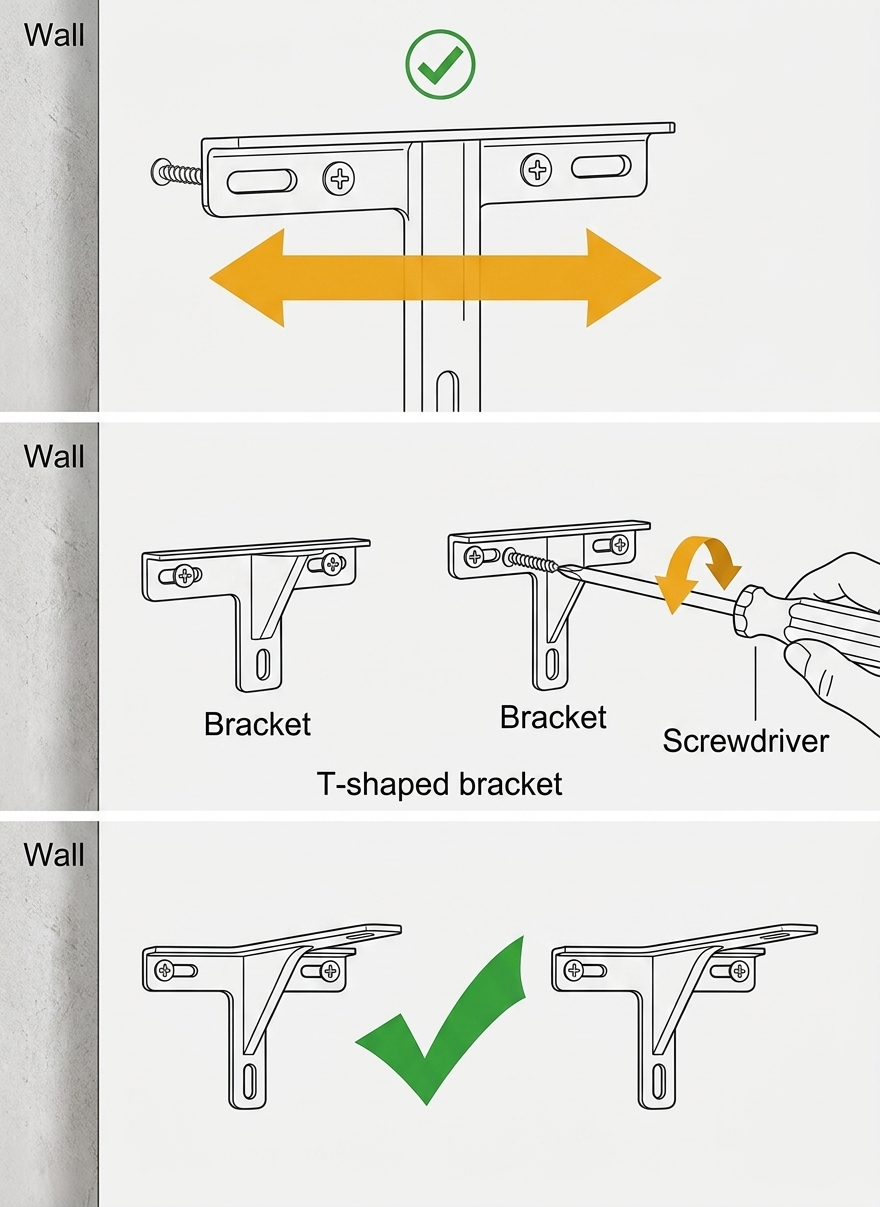
Line up the bracket holes with the wall anchors and screw them in, but don't fully tighten yet.
7Align brackets, then tighten
Slide the brackets left or right so they match the shelf's mounting holes, then fully tighten the screws.
8Mount the first shelf
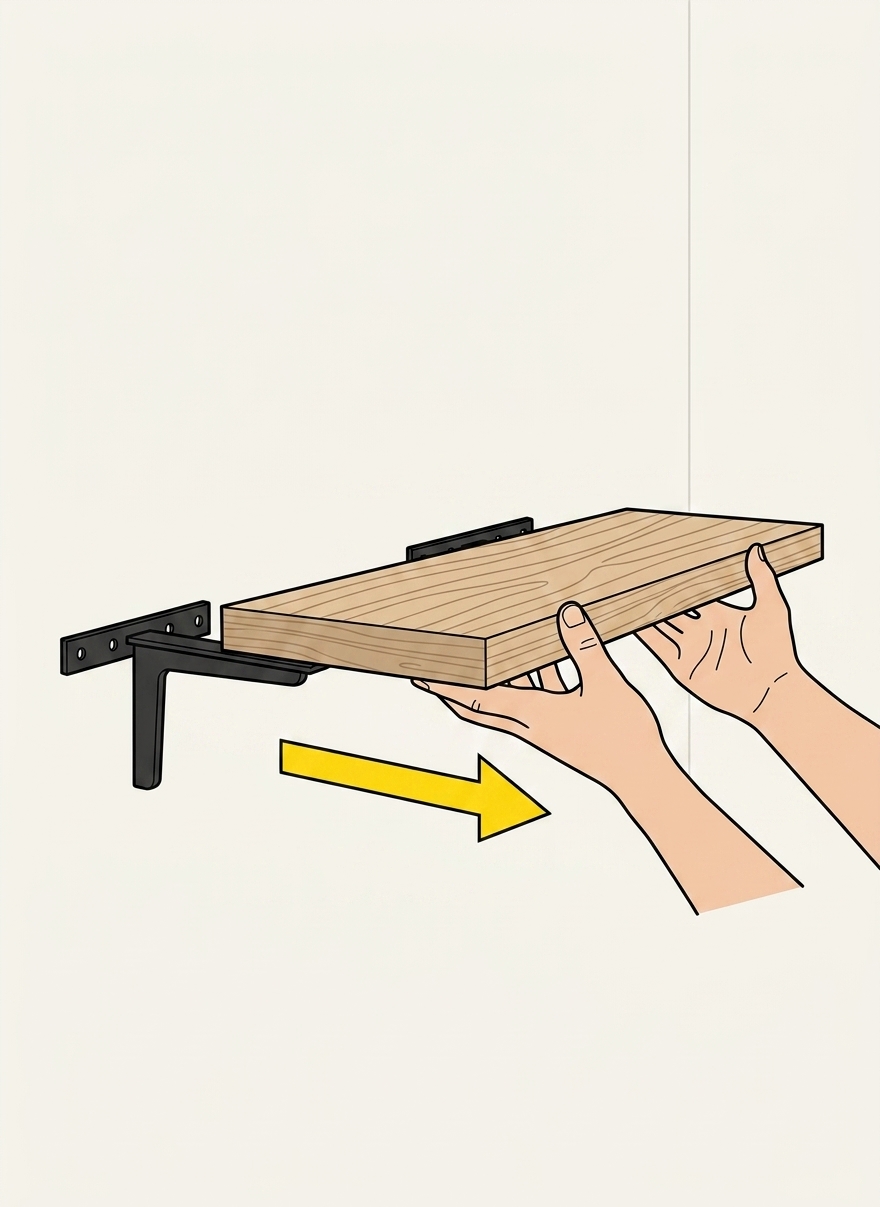
Slide the wood shelf fully onto the installed brackets at the 1.5m marked location, supporting it as you go.
9Repeat for second shelf
Repeat the marking, drilling, bracket, and shelf steps for the second shelf at the same 1.5m height.
10Final stability check
Check both shelves are level and press down and sideways on each to make sure they don't wobble.
Get a guide for your own job
Point Semble at your manual and the spot where it goes — and get a guide like this, made for you.
Download on the App StoreThis example is for illustration. Semble's guides are AI-generated and may be incomplete or inaccurate — always follow the manufacturer's instructions and local safety codes, and consult a professional for anything involving electricity, gas, plumbing, or structural work.